

Have you recently purchased a power drill or are planning to, but find yourself overwhelmed by its complexity? You’re not alone. Many beginners struggle with the nuances of using a power drill effectively. This guide is crafted to ease your journey into the world of power drills, making it a less daunting experience.
How to Use a Power Drill for Beginners? Power drills are versatile tools essential for various household projects, from simple tasks like hanging pictures to more complex DIY endeavors. Knowing how to use a power drill properly can save time and enhance the quality of your work.
The information in this blog will navigate you through the basics of using a power drill. From understanding its components to mastering practical applications, you’ll learn how to utilize this tool safely and efficiently. Whether you’re a DIY enthusiast or just need to perform occasional repairs, this guide promises to transform your apprehension into confidence.
Understanding the Power Drill For Beginners

Description and Uses of a Power Drill
A power drill is a versatile tool used in various construction, woodworking, and metalworking tasks. It’s designed to bore holes into different materials like wood, metal, or plastic.
Power drills offer precision and power, making them indispensable in both professional settings and home DIY projects. Their uses extend from simple tasks like hanging pictures to more complex operations like constructing furniture or installing cabinetry.
Types of Power Drills
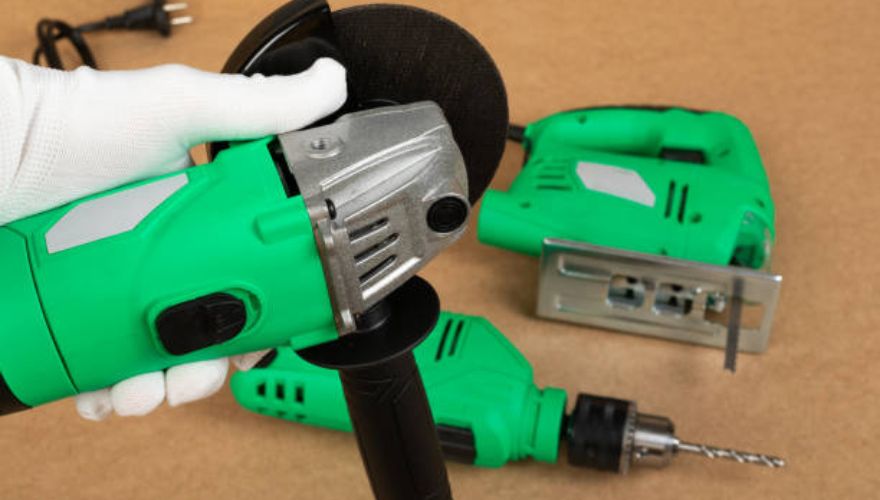
Power drills are broadly categorized into corded and cordless types. Corded drills provide a steady power supply, ensuring consistent performance for prolonged periods, which is ideal for heavy-duty tasks.
On the other hand, cordless drills offer portability and convenience, powered by rechargeable batteries. They are perfect for tasks that require mobility or where electrical outlets are not readily available.
Key Components of a Power Drill
The effectiveness of a power drill lies in its key components. The chuck, a clamp at the drill’s front, holds the drill bits securely and comes in various sizes to accommodate different bit types.
Drill bits, the cutting tools, are available in multiple shapes and sizes, each designed for specific materials and types of drilling. The power source, whether electric or battery-powered, determines the drill’s torque and speed, influencing its suitability for different tasks.
Other components like the clutch, speed control, and ergonomic design enhance usability and efficiency.
Using the Power Drill For Beginners

Step-by-Step Guide to Using the Drill For Beginners
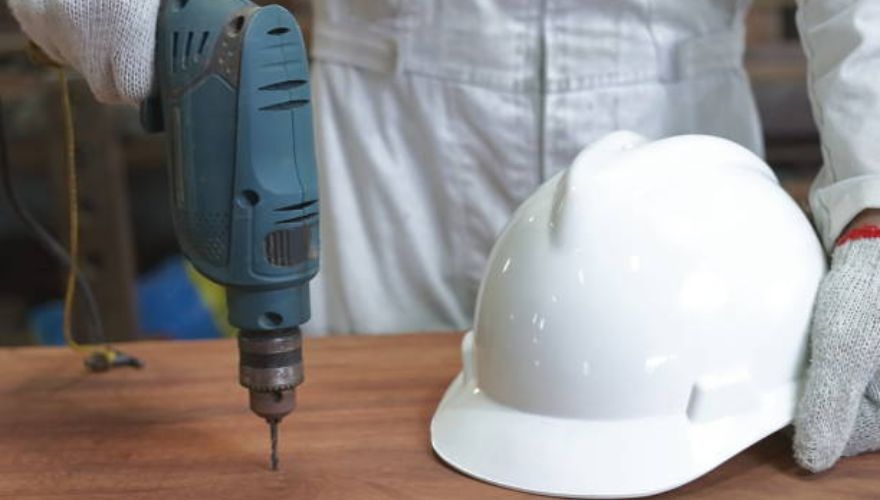
Embarking on your drilling journey begins with understanding your power drill. Start by selecting the appropriate drill bit for your material. Insert the bit securely into the chuck, ensuring it is tightly fastened.
Before you begin, make sure the drill is set to the correct direction – forward for drilling into material, and reverse for removing screws. Always check that the power source, whether a battery or a cord, is properly connected and the drill is charged or plugged in.
Positioning the Drill
Accuracy in drilling is largely dependent on how you position the drill. For precision, mark the exact spot where you want to drill with a pencil or a small indentation.
Align the drill bit perpendicularly to the surface; this ensures the hole is straight and true. Grip the drill firmly with both hands, if possible, for better control. Ensure your stance is balanced and stable, providing support for the force you’ll exert.
Starting at a Slow Speed and Increasing Gradually
Control is key when using a power drill. Begin drilling at a low speed to establish the hole. This initial slow speed prevents the bit from slipping off the mark. Once the hole is started, gradually increase the speed.
The speed increase depends on the material you’re drilling into; harder materials may require a slower speed throughout to prevent overheating the bit, while softer materials can be drilled into more quickly.
Applying Steady Pressure
Applying the right amount of pressure is crucial. Too little and the drill won’t penetrate the surface; too much, and you risk damaging the material or the drill bit.
Apply steady, moderate pressure as you drill. Let the drill do the work – you’re guiding it rather than forcing it. If you feel resistance, ease up a bit and let the drill bit cut through the material.
:
Tips for Beginners To Drilling Different Materials
Different materials require different approaches. For wood, use sharp, high-speed steel bits and drill at a moderate speed to avoid splintering.
For metal, use a metal bit and consider using a lubricant to prevent overheating. With masonry, a carbide-tipped bit is essential, and a hammer drill function can be very helpful. Always start with a smaller pilot hole for harder materials.
How to Control Depth and Avoid Splintering or Cracking
Controlling the depth of your drilling is important for many projects. To avoid drilling too deep, use a drill stop or put a piece of tape on the drill bit as a visual guide.
When working with delicate materials like wood, approach the exit point slowly to prevent splintering. For materials prone to cracking, such as ceramic or glass, start with a smaller bit and gradually increase the size, and always drill at a low speed.
Preparing to Power Drill For Beginners

Selecting the Right Drill Bit
Choosing the correct drill bit is crucial for efficient and safe drilling. For wood, use lip and spur drill bits; for metals, HSS (High-Speed Steel) bits are ideal.
Masonry requires a tungsten carbide tip. Consider the material hardness, bit diameter, and the type of drill you have (e.g., standard or hammer drill) for optimal selection.
Attaching the Drill Bit Securely
To ensure safety and accuracy, securely attaching the drill bit is vital. First, loosen the drill’s chuck, insert the bit’s shank, and then tighten the chuck firmly.
For keyed chucks, use the key to tighten evenly in all three holes. Ensure the bit is centered and straight to avoid wobble during drilling.
Preparing Your Work Area
A well-prepared work area enhances safety and precision. Start by securely clamping down the material to prevent movement.
Use clamps that are suitable for the material’s thickness and your workbench. Then, precisely mark the drill points using a center punch for metals or a pencil for softer materials. Clear the area of unnecessary tools and debris to maintain a focused environment.
.
Safety First For Beginners
Importance of Safety When Using Power Tools
Safety is paramount when operating power tools to prevent accidents and ensure the well-being of users. These tools, designed for efficiency and power, can pose significant risks if mishandled.
Understanding and respecting the power of these tools are crucial for maintaining a secure working environment. It’s imperative to adopt a safety-first mindset, acknowledging that the proper use of power tools not only enhances productivity but also safeguards the user from potential hazards.
Personal Protective Equipment (PPE)
Equipping oneself with the right Personal Protective Equipment (PPE) is a fundamental step in minimizing the risks associated with power tool usage. Essential items such as safety goggles protect the eyes from flying debris, while gloves guard against cuts and abrasions.
Depending on the nature of the task, additional equipment like ear protection or dust masks might be necessary. It’s essential to understand that PPE acts as a crucial barrier between the user and the inherent risks of operating power tools.
Pre-use Safety Checks
Before commencing any task, conducting thorough pre-use safety checks is indispensable. This process involves inspecting the power tool for any signs of damage, ensuring all parts are secure and in good working order.
The work area should also be scrutinized for potential hazards, ensuring it’s clean, well-lit, and free from any obstructions. By taking these proactive measures, one can significantly diminish the likelihood of accidents, ensuring a smoother and safer operation.
After-Drill Care and Maintenance For Beginners
Cleaning the Drill After Use
Ensuring the longevity and optimal performance of your drill begins with proper cleaning after each use. Dust, debris, and residual material can accumulate in and on the drill, potentially causing damage over time.
Use a soft brush or compressed air to gently remove particles from the drill’s surface and vents. For tougher grime, a damp cloth with mild detergent can be used, followed by a dry cloth to prevent moisture damage.
Safe Storage of the Drill and Accessories For Beginners
Proper storage of the drill and its accessories is crucial for safety and maintenance. Store the drill in a dry, cool place away from direct sunlight and excessive heat, which can damage the drill’s components.
Organize drill bits, chargers, and other accessories in a sturdy case to prevent loss and damage. This practice not only prolongs the life of the drill but also ensures that it is ready and in good condition for the next use.
Regular Maintenance Checks
Regular maintenance checks are essential to identify potential issues before they become major problems. Periodically inspect the drill for any signs of wear and tear, such as frayed cords, loose components, or unusual noises during operation.
Check the battery condition for cordless drills, ensuring it holds charge and doesn’t show signs of swelling or leakage. Consult the manufacturer’s guidelines for specific maintenance recommendations and consider professional servicing if necessary.
Common Issues For Beginners

Dealing with a Stuck Drill Bit
When a drill bit becomes stuck, it’s crucial to remain calm and avoid forcing it. Firstly, disconnect the power supply to ensure safety.
Gently wiggle the bit while applying a penetrating oil to ease its release. If the bit remains immovable, use locking pliers for a firm grip and carefully rotate back and forth. This approach minimizes the risk of breaking the bit or damaging the material.
What to Do if the Drill Overheats
An overheating drill is a common issue, often caused by excessive use or friction. To address this, stop drilling and allow the tool to cool down naturally. Avoid water or coolants as they can damage the drill’s motor.
To prevent future overheating, ensure the drill bit is sharp, use the correct speed settings, and apply steady, moderate pressure during use. Regular maintenance, like cleaning air vents, also helps in heat dissipation.
Solutions for Common Drilling Mistakes For Beginners
Drilling mistakes can range from surface damage to improper hole sizes. To avoid them, start with a pilot hole to guide the larger bit.
Ensure you’re using the correct bit type for the material, and check the bit’s sharpness. For precise depth, use a drill stop or masking tape on the bit as a depth guide. If surface cracking occurs, reduce pressure and speed, and support the back of the material to minimize breakout.
Conclusion
Mastering the use of a power drill is a valuable skill that enhances your DIY capabilities, making a variety of home projects accessible and enjoyable.
As you finish this guide, remember that practice makes perfect. Don’t hesitate to try different drills and bits, and experiment with various materials. Always prioritize safety and remember, every project awaits!
