
When it comes to home improvement and repairs, drilling into vinyl siding can be a daunting task. You might find yourself needing to do this for a variety of reasons, such as installing outdoor lighting, security cameras, or even just for decorative purposes. The challenge lies in doing so without damaging the siding or compromising the integrity of your home’s exterior. It’s important to approach this task with the right technique and tools to ensure a clean, safe job.
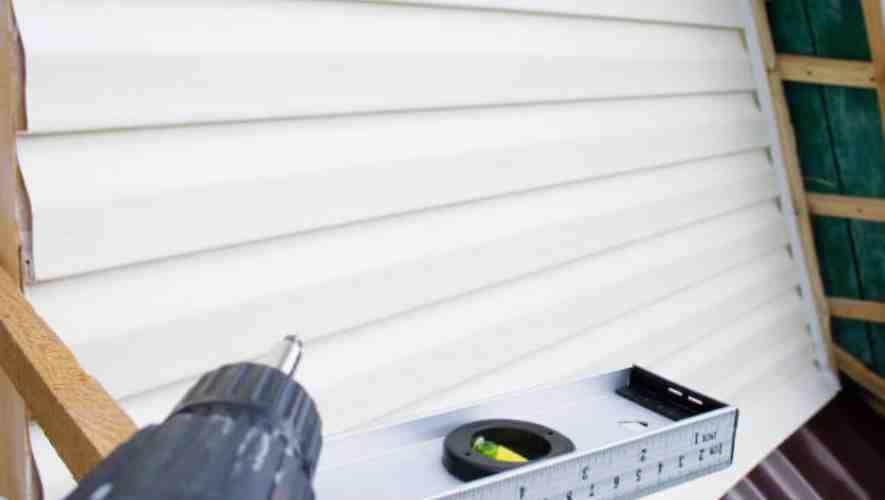
How To Drill Into Vinyl Siding? Drilling into vinyl siding requires careful planning and the right tools. You need to use a drill bit that is slightly larger than the screw or anchor you plan to use. Always start with a smaller pilot hole and gradually increase the size. This prevents cracking or splitting of the siding.. Use a vinyl siding mounting block to create a flat, stable surface for your fixtures or decorations.
The purpose of this blog is to guide you through the steps of drilling into vinyl siding safely and effectively. You’ll learn about the tools and techniques needed to avoid common pitfalls, ensuring a successful installation. Whether you’re a DIY enthusiast or a first-timer, this blog will provide valuable insights and practical tips. By the end, you’ll be equipped with the knowledge to tackle this task with confidence.
Tools and Materials Needed
List of Required Tools (Drill, Drill Bits, etc.)
The cornerstone of your toolkit should be a reliable drill, which acts as the workhorse for most projects. Select a drill that is comfortable to handle yet powerful enough for your needs, whether it’s for home DIY projects or more professional endeavors.
Along with the drill, an assortment of drill bits is crucial. These should include various sizes and types, such as twist bits for general use, spade bits for larger holes, and masonry bits for concrete or brick. Ensure your drill bits are compatible with your drill model and are of high quality to withstand the demands of your project.
Selection of Appropriate Drill Bits
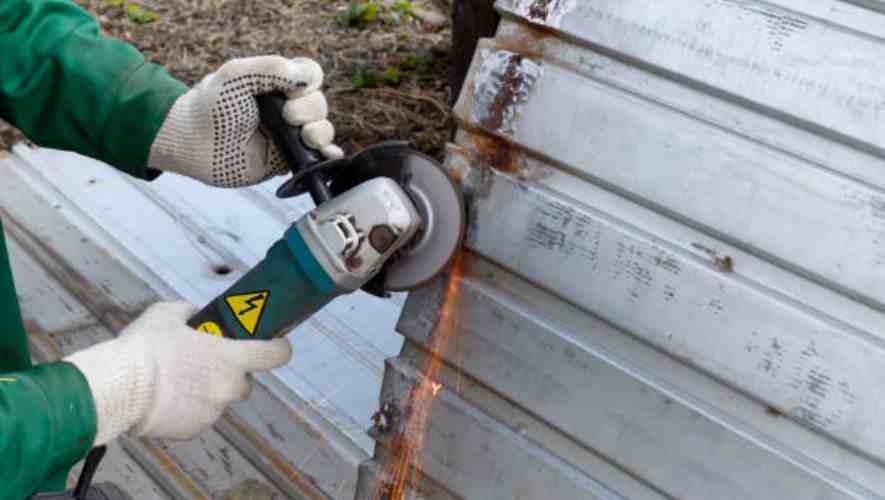
Choosing the right drill bit is not just about size, but also about material and design. For woodworking, opt for sharp, high-speed steel bits, while for metal, cobalt or titanium-coated bits are preferable due to their durability and heat resistance.
When dealing with tiles or glass, diamond-tipped drill bits are ideal as they prevent cracking. The length and shape of the bit also matter, with longer bits being suitable for deep holes and angled bits for special drilling angles. It’s essential to match the drill bit not only to the material you are working with but also to the specific task at hand.
Additional Materials (Caulk, Sealants, etc.)
Beyond the primary tools, your project might require additional materials like caulk and sealants. Caulk is used for sealing gaps and cracks, ensuring moisture and air cannot penetrate surfaces.
There are different types of caulk, such as silicone, latex, or acrylic, each suited for different environments and materials. Sealants, on the other hand, provide a more durable and flexible solution for joints and moving parts. They are essential for tasks that demand waterproofing and long-term resilience.
Always choose these materials based on compatibility with your working surfaces and the environmental conditions they will be exposed to.
Drilling Process
Step-by-Step Guide to Drilling
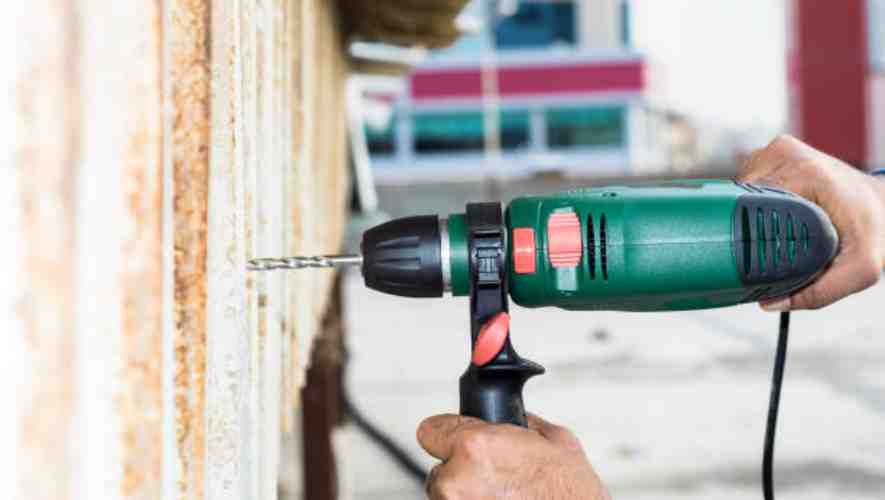
The first step in drilling is selecting the appropriate drill bit for the material. For instance, wood, metal, and concrete each require different types of bits. Next, mark the exact spot where the hole is needed, ensuring accuracy in your work.
Then, set the drill to the correct speed and gently press against the material. Start slowly, increase speed and apply steady pressure until the hole is complete. Always wear safety gear to protect from potential hazards.
Techniques for Clean and Precise Drilling
Achieving clean and precise drilling involves several techniques. Firstly, using a center punch on the mark can help guide the drill bit and prevent slipping.
Second, applying the right amount of pressure is crucial; too much can damage the material, while too little can make the process inefficient. Regularly withdrawing the bit helps clear out debris, reducing friction and overheating.
Lastly, using lubricants for metal drilling can enhance precision and extend the life of the drill bit.
Adjustments for Different Types of Vinyl Siding
When drilling into vinyl siding, special considerations are necessary to avoid damage. Vinyl is softer and more flexible than materials like wood or concrete, requiring a gentler approach. Use a drill bit specifically designed for plastics and vinyl to prevent cracking.
It’s also important to drill a hole slightly larger than the fastener to allow for expansion and contraction due to temperature changes. Support the back of the siding to prevent buckling during the drilling process.
Tips for Avoiding Damage
Preventing damage during drilling requires attention to detail and careful handling. Always begin with a pilot hole in hard or brittle materials, to guide the larger bit and reduce the risk of cracking.
Avoid pushing the drill too hard; let the bit do the work. Keep the drill straight to avoid enlarging the hole unnecessarily. Regularly check the temperature of the bit and material, as overheating can cause damage. By following these tips, one can ensure a successful and damage-free drilling process.
Post-Drilling Procedures
Inspecting the Drilled Holes
After the drilling process, a meticulous inspection of the drilled holes is essential. This step ensures that the holes align precisely with the project specifications and are free from any irregularities that could affect structural integrity.
Professionals use measuring tools to check the diameter and depth of each hole, making sure they match the required dimensions. This thorough inspection is crucial in preparing for the next steps of the project, guaranteeing that the initial drilling has laid a solid foundation for subsequent work.
Applying Sealants and Caulks
Once the drilled holes are confirmed to meet the necessary standards, the application of sealants and caulks is the next critical step. This process involves filling any gaps or spaces around the holes to prevent moisture ingress and enhance structural stability.
The choice of sealant or caulk depends on the material being worked on and the environmental conditions. Professionals ensure that the applied products are compatible with the base material, applying them evenly for a durable and effective seal.
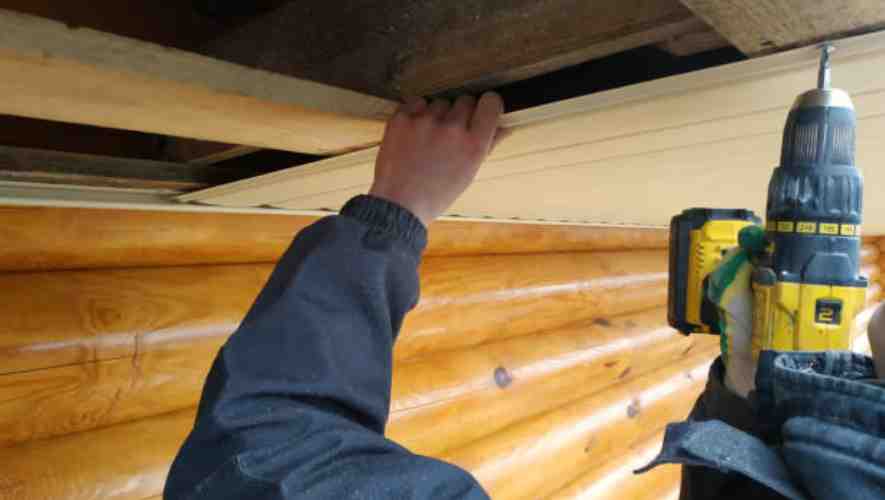
Attaching Fixtures or Hardware (if applicable)
In scenarios where fixtures or hardware need to be attached post-drilling, precise and careful installation is paramount.
This step requires aligning the fixtures or hardware perfectly with the pre-drilled holes, ensuring a snug and secure fit. Professionals use specialized tools to tighten and secure these elements, taking care not to damage the surrounding material.
This meticulous attachment process is crucial for the functionality and aesthetics of the final installation.
Cleaning and Finishing Touches
The final stage in post-drilling procedures is cleaning and applying finishing touches. This phase involves removing any debris or dust resulting from the drilling and installation processes, ensuring a clean and polished look.
Professionals often use vacuum cleaners, brushes, and cloths for effective cleaning. They may apply touch-up paint or other finishing materials to conceal any marks or irregularities, leaving the project area in a pristine and visually appealing state.
Conclusion
When drilling into vinyl siding, remember to measure carefully, use the appropriate drill bit size, and proceed slowly to avoid damaging the siding. A mounting block can provide a secure and aesthetically pleasing base for your installation.
In conclusion, drilling into vinyl siding is a task that, while seemingly complex, can be mastered with the right approach and tools. The key is to proceed with patience and precision. Remember, it’s not just about making a hole; it’s about preserving the look and integrity of your home’s exterior. Hopefully, this guide has provided you with the insights and confidence needed to undertake this project. Remember, with the right preparation and care, you can achieve professional-looking results on your own
