
When it comes to security, a broken or malfunctioning storage cylinder lock can be more than just an inconvenience; it’s a barrier to accessing important items. Whether it’s due to a lost key, a damaged lock, or simply an old and uncooperative mechanism, you might find yourself in a situation where drilling out the lock is the only viable solution. This guide aims to help you navigate this process with ease.
How To Drill Out A Storage Cylinder Lock? Drilling out a storage cylinder lock is a straightforward process that involves using a drill and a suitable drill bit to remove the lock mechanism. This method is often used as a last resort when other unlocking methods fail. It’s a handy skill to have in emergency situations where quick access is needed.
The following guide is designed to walk you through each step of drilling out a storage cylinder lock. We’ll cover the tools you’ll need, the precautions to take, and the technique to use. By the end of this article, you’ll be equipped with the knowledge to tackle this task confidently. Whether you’re a homeowner, a DIY enthusiast, or someone facing an urgent lock issue, this guide has got you covered.
Tools and Materials Needed
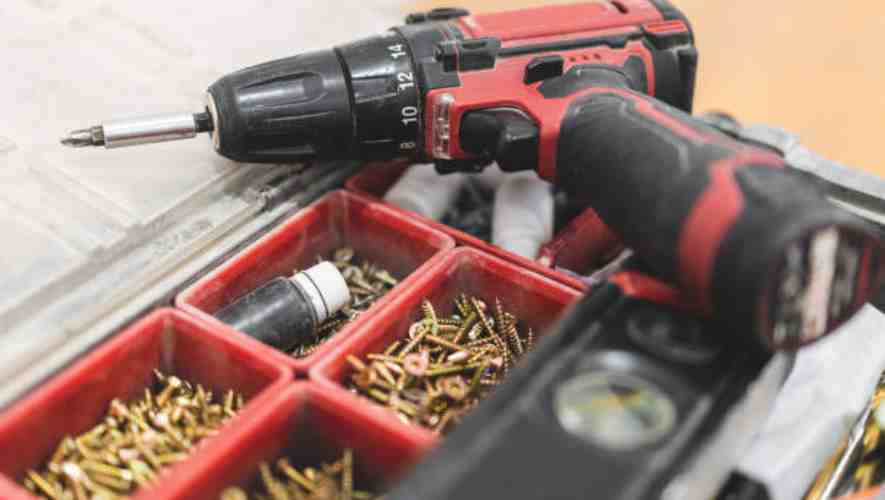
List of Required Tools
To ensure a seamless and safe drilling experience, it is imperative to gather all necessary tools before commencing your project. Key tools include a reliable drill, a variety of drill bits suitable for your specific material, and safety gear such as gloves, goggles, and ear protection. Having these tools at hand not only streamlines the process but also significantly mitigates the risk of accidents and material damage.
Selection of the Correct Drill Bit Size and Type
Choosing the correct drill bit is not just about size, but also about understanding the material you are working with. Drill bits come in various types, such as twist, spade, and masonry, each tailored for different materials and applications. The correct size and type of drill bit ensures efficient drilling and prolongs the life of both your drill and bits, preventing wear and ensuring precision in your work.
Additional Materials
While the drill and drill bits are pivotal, additional materials play a crucial role in the drilling process. Lubricant, for instance, is essential for reducing friction and heat build-up, thereby extending the life of your drill bits and preventing material warping. Having a collection pan or a similar container for metal shavings is not only about cleanliness but also about safety, ensuring that the workspace remains free from potentially hazardous debris.
Preparing the Lock and Work Area
Steps to Clean and Lubricate the Lock
Cleaning and lubricating a lock is a delicate process that requires attention to detail. Start by carefully disassembling the lock, if possible, to access all internal components.
Use a mild cleaner or a specialized lock cleaning solution to gently remove dirt and grime from each part, avoiding harsh chemicals that can damage the lock’s mechanisms.
After cleaning, apply a high-quality lubricant specifically designed for locks, ensuring it reaches all moving parts. This not only enhances the lock’s functionality but also prolongs its lifespan.
Securing the Lock or Door to Prevent Movement
To effectively work on a lock, it’s vital to secure the lock or door to prevent any movement. This can be achieved by using clamps or locking pliers to stabilize the lock mechanism, or by ensuring the door is held firmly in place, if working on a door lock.
This step is important to avoid any shifts or accidental closures, which can not only disrupt the maintenance process but also pose a safety risk. A stationary work environment allows for precise adjustments and reduces the likelihood of errors.
Safety Measures for the Workspace
Implementing safety measures in the workspace is non-negotiable when maintaining locks. Essential safety gear includes eye protection to shield against any debris or lubricant splashes.
Gloves are recommended to protect hands from sharp edges and prevent fingerprints on the lock components. Ensure the work area is well-ventilated, if using chemical cleaners or aerosol lubricants. Taking these precautions helps to prevent accidents and ensures a safe and effective lock maintenance process.
Drilling Process
Step-by-Step Guide on How to Drill the Lock
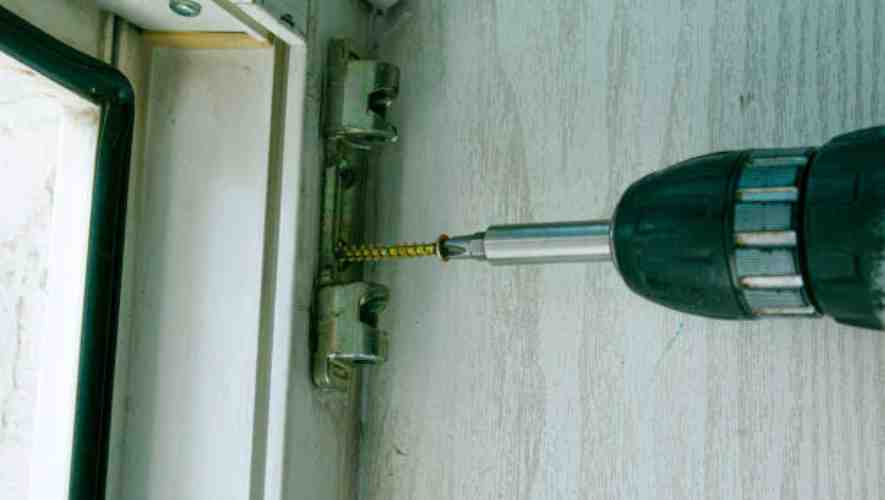
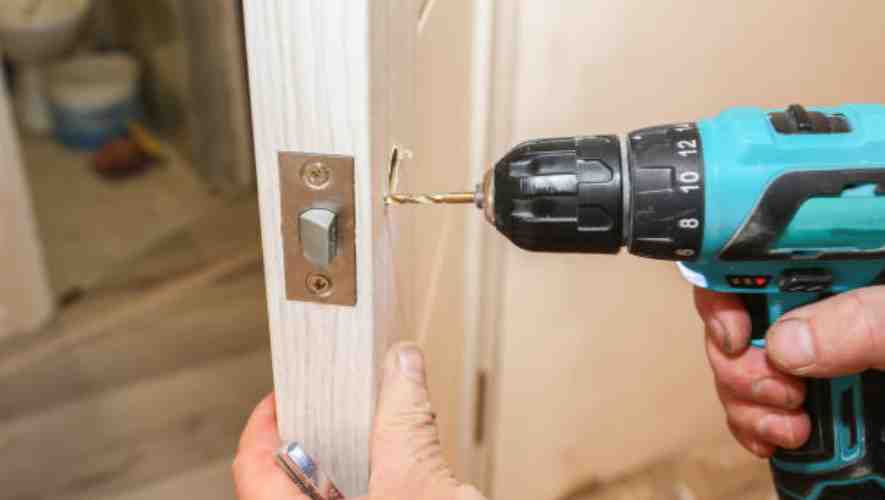
Drilling a lock requires precision and patience. Begin by selecting the correct drill bit, a tone that is hard enough to penetrate the lock’s material, such as a cobalt or carbide bit. Secure the lock firmly to prevent movement during drilling.
Start by making a small indentation at the center of the keyhole, which will serve as a guide for the drill bit. Proceed with a slow and steady speed, applying consistent pressure to penetrate the lock. withdraw the drill bit to remove metal shavings and reduce heat buildup.
Techniques for Aligning and Angling the Drill
Proper alignment and angling are crucial for efficient drilling. Ensure the drill is perpendicular to the lock’s surface to maintain alignment. This reduces the risk of the drill bit slipping or causing uneven wear.
If dealing with a complex lock, consider using a drill guide for enhanced accuracy. The angling of the drill can be adjusted slightly if encountering resistance, but always return to the perpendicular position for the majority of the drilling process. This technique helps in smoothly navigating through the different layers of the lock mechanism.
Tips for Gradual Drilling and Avoiding Damage to Surrounding Areas
Gradual drilling is key to avoiding damage to the lock and the surrounding areas. Begin with a smaller drill bit and gradually increase the size as needed. This step-by-step approach allows for more control and reduces the likelihood of damaging internal components of the lock.
Lubricating the drill bit can also help in reducing friction and heat.. Using a hand drill or a drill press with a variable speed setting can offer better control over the drilling speed, which is essential in delicate operations. Always wear safety goggles and gloves to protect from metal shards and ensure a safe working environment.
Post-Drilling Procedures
Removing the Lock Cylinder and Metal Shavings
Once the drilling process is complete, the immediate step involves the careful removal of the lock cylinder. This is a delicate procedure that requires precision to ensure that the integrity of the door and its frame is not compromised.
Equally important is the meticulous collection and disposal of metal shavings. These shavings, if left unattended, can pose a safety risk and may cause damage to the flooring or nearby objects. Professional handling ensures that these remnants are thoroughly cleaned up, maintaining a safe and clean work environment.
Checking for and Repairing Any Collateral Damage
Drilling a lock is an invasive procedure that can sometimes lead to collateral damage around the lock area. It’s essential to conduct a thorough inspection for any such damage post-drilling. This may include scratches, dents, or misalignments in the door or frame.
Prompt identification and repair of these damages are crucial to restore the door to its original condition. This step not only involves technical skill but also an eye for detail to ensure that all aspects of the door and frame are functioning correctly post-repair.
Disposal of the Old Lock and Cleanup of the Area
After the removal of the lock cylinder and the repair of any collateral damage, the next step is the disposal of the old lock. This should be done in an environmentally responsible manner, adhering to any local regulations regarding metal and electronic waste.
A thorough cleanup of the area is imperative to ensure no parts, tools, or debris are left behind. This step is crucial in maintaining professionalism and shows respect for the client’s property, leaving the workspace in a neat and orderly condition.
Conclusion
Successfully drilling out a storage cylinder lock requires patience, the right tools, and a steady hand. By following the steps outlined in this guide, you can efficiently and safely remove a problematic lock without causing unnecessary damage.
In conclusion, while drilling out a lock is a practical skill, it’s also a responsibility. Always ensure that you’re legally permitted to perform this action and remember, it’s a method of last resort. If you’re unsure or uncomfortable with the process, seeking professional assistance is always a wise choice. By keeping safety and legality in mind, you can resolve your lock issues effectively and maintain the integrity of your storage space.
