
Are you struggling with the stubborn remnants of gel polish on your nails? You’re not alone. Many beauty enthusiasts face the challenge of safely and effectively removing gel polish without damaging their nails. This common dilemma often leads to the question: Which drill bit should you use to remove gel polish?
Which Drill bit to remove gel polish? The best drill bit for removing gel polish is a medium grit, diamond or ceramic bit. This type of drill bit is effective in removing gel polish quickly while being gentle on the natural nail. It’s essential to choose a bit that balances efficiency with nail health.
You might wonder why it’s crucial to select the right drill bit and how it can make a difference in your nail care routine. This blog will delve into the types of drill bits available, their specific uses, and tips for safe removal. By the end of this read, you’ll not only be equipped with the knowledge of the right drill bit to choose but also how to use it effectively, ensuring that your nails stay healthy and beautiful.
Which drill bit to remove gel polish

Description of Different Drill Bits Used for Gel Polish Removal
When removing gel polish, a variety of drill bits can be employed, each designed for specific aspects of the removal process. Ceramic bits are known for their gentleness and heat resistance, making them ideal for clients with sensitive nails.
Carbide bits, on the other hand, are crafted for efficiency and speed, excelling in removing thicker gel polish quickly.
Diamond bits are renowned for their precision and durability, often used for fine detailing or in removing gel polish from harder-to-reach areas. The choice of drill bit plays a crucial role in the effectiveness and safety of the gel polish removal process.
Materials and Manufacturing Aspects of Drill Bits
The manufacturing of drill bits for gel polish removal is a meticulous process, focusing on material quality and design precision. Ceramic bits are made from high-quality, heat-resistant ceramic material, ensuring minimal heat build-up.
Carbide bits are crafted from a combination of carbon and tungsten, known for their strength and longevity. Diamond bits, incorporating small pieces of diamond, are valued for their exceptional abrasiveness and durability.
The manufacturing process of each type of bit is tailored to enhance these material properties, ensuring effective and safe usage in nail care.
Pros and Cons of Various Types (e.g., Ceramic, Carbide, Diamond)
Each type of drill bit has its unique advantages and disadvantages. Ceramic bits are less abrasive, reducing the risk of nail damage, but may be less effective on very thick gel polishes. Carbide bits are highly effective in quick polish removal but can be too harsh for thin or sensitive nails.
Diamond bits offer precision and durability but at a higher cost and may require more skill to use effectively. The choice of bit depends on the specific requirements of the gel polish removal process and the client’s nail condition.
Selection Criteria Based on Nail Health and Polish Type
Selecting the right drill bit for gel polish removal involves considering both the client’s nail health and the type of polish used. For thin, fragile nails or clients with sensitivity, a ceramic bit is often the best choice due to its gentle nature.
For thick, hard-to-remove gel polishes, a carbide bit might be more suitable, offering quick and efficient removal. Diamond bits are ideal for clients needing detailed work or for removing polishes from hard-to-reach areas.
The key is to balance the effectiveness of polish removal with the preservation of nail health.
Techniques for Using Drill Bits on Gel Polish
Step-by-Step Guide on Using Drill Bits for Gel Polish Removal
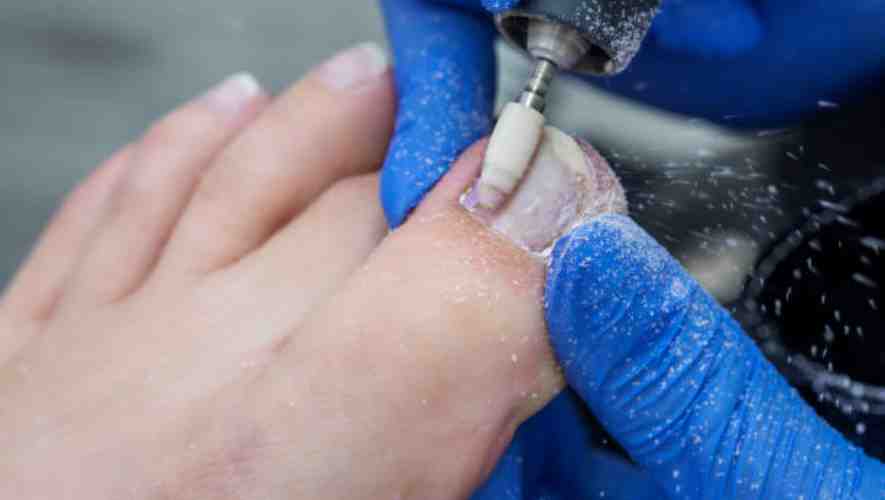
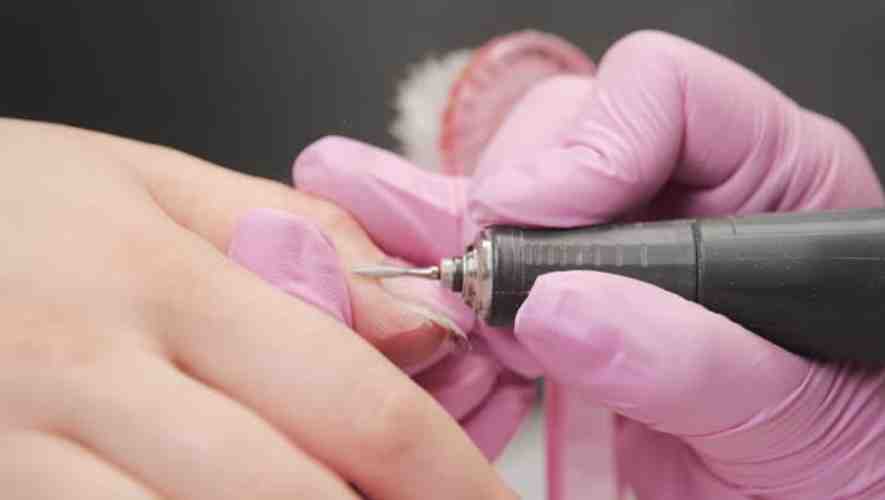
Using drill bits to remove gel polish is an efficient technique when performed correctly. Begin by choosing the appropriate bit, typically a fine-grit one for gel polish.
Ensure your drill is at a low to medium speed to avoid heat buildup. Gently glide the bit over the nail surface in a back-and-forth motion, focusing on the thickest areas of polish first. Continuously lift the drill bit to check the progress and prevent over-filing, aiming to thin out the polish rather than completely remove it.
Tips for Beginners and Professionals
For beginners, mastering the use of drill bits requires practice and patience. Start with a low-speed setting and practice on a nail tip or a practice finger to gain confidence.
Professionals should always prioritize the client’s comfort, ensuring the drill does not touch the nail bed or cuticles. Regularly sanitizing and maintaining your equipment is crucial for both safety and efficiency.
Investing in quality drill bits can significantly improve the precision and outcome of your work.
Techniques for Minimizing Nail Damage
Minimizing nail damage is paramount when using drill bits. Opt for a bit that matches the nail’s curvature to reduce the risk of cutting into the nail bed.
Apply light pressure and keep the drill moving to avoid creating hot spots. It’s essential to leave a thin layer of polish to protect the nail, especially when working on thin or fragile nails. Regularly conditioning the nails and cuticles with oils or creams post-removal helps in maintaining nail health.
How to Achieve a Smooth and Even Finish
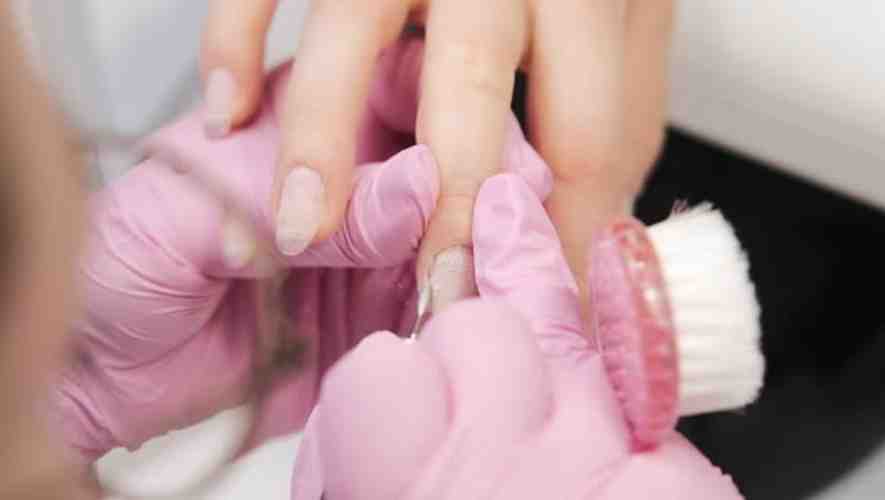
Achieving a smooth and even finish is the hallmark of a professional gel polish removal. After thinning out the majority of the polish, switch to a finer grit bit to buff away the remaining polish, blending seamlessly into the natural nail.
Pay special attention to the edges and tips, ensuring they are free of any rough spots. Finally, using a soft hand file, gently refine the surface for a flawless finish. This meticulous approach ensures the nails are perfectly prepped for the next polish application or for leaving them naturally polished.
Health and Safety Considerations

Importance of Maintaining Nail Health
Healthy nails are a cornerstone of overall aesthetic appeal and hygiene. Nurturing nail health is essential, as it reflects an individual’s commitment to personal grooming and well-being.
Consistent care, balanced nutrition, and proper hydration play pivotal roles in maintaining nail strength and vitality.
Professionals should advocate for routine nail maintenance and educate clients about the adverse effects of neglect, such as brittleness, discoloration, and susceptibility to fungal infections, ensuring that nail health is held in high regard.
Risks Associated with Improper Use of Drill Bits
The use of drill bits in nail care, while effective, carries inherent risks if not handled correctly. Improper use can lead to physical injuries, such as cuts or abrasions, and long-term nail damage.
Overuse or incorrect application can also generate excessive heat and friction, potentially leading to discomfort or burns.
It is crucial for professionals to receive proper training in equipment handling, understand the suitable drill bit for each task, and maintain a gentle touch to mitigate these risks and uphold the highest safety standards.
Safety Equipment and Practices
Incorporating safety equipment and practices in nail care routines is indispensable. Protective eyewear shields against accidental splashes of harmful chemicals or flying debris.
Ventilation systems are crucial to dispel dust and chemical fumes, ensuring a clean and safe breathing environment. Technicians should also adhere to proper sanitization protocols for tools and workstations to prevent cross-contamination.
Emphasizing these safety practices not only safeguards the health of technicians and clients but also fosters a professional and trustworthy service environment.
Tips for Preventing Infections and Injuries
Prevention of infections and injuries is integral to a safe nail care experience. Regular sterilization of tools and equipment is non-negotiable to ward off bacterial and fungal infections.
Technicians should conduct thorough consultations to understand clients’ medical history and allergies, tailoring services to individual needs and conditions.
Professionals should stay informed about the latest safety guidelines and continuously educate clients on proper aftercare procedures. By adopting these meticulous preventive measures, nail care establishments can ensure a hygienic, secure, and enjoyable experience for all clients.
Maintenance and Care of Drill Bits
Cleaning and Disinfecting Drill Bits
Proper cleaning and disinfection of drill bits are crucial to maintain their efficiency and longevity. Start by removing debris and dust from the bit using a soft brush or air blower.
For disinfecting, soak the bits in a suitable cleaning solution that is effective yet gentle enough to prevent corrosion.
Thoroughly dry the bits before storage to prevent rusting. This process not only keeps the drill bits in optimal condition but also ensures safety and hygiene, especially in industries where sterility is paramount.
Storage and Handling to Prolong Lifespan
The way drill bits are stored and handled significantly influences their lifespan. Store them in a dry, cool place, ideally in a case or holder that keeps them organized and protected from environmental elements.
Avoid tossing them loosely in a toolbox where they can rub against each other, leading to premature dulling and wear.
Handling them with care, avoiding dropping or striking them, also plays a key role in preserving their sharpness and structural integrity, ensuring they remain reliable for future tasks.
Signs of Wear and When to Replace Drill Bits
Knowing when to replace drill bits is essential for maintaining efficiency and safety in operations. Common signs of wear include bluntness, visible chips or cracks, and difficulty in achieving clean cuts.
A worn-out drill bit not only compromises the quality of work but also requires more force to operate, leading to potential safety hazards and damage to the material being drilled.
Regular inspection and timely replacement of drill bits are, therefore, crucial practices in any operation that relies on them.
Environmental Considerations in Disposal
The disposal of drill bits carries environmental considerations that should not be overlooked. Since many drill bits are made of metals and alloys, they can be recycled rather than discarded in landfills.
Contacting local recycling centers to understand the correct disposal method is a responsible approach.
Being aware of the materials of your drill bits helps in segregating them correctly for recycling, contributing to a more sustainable and environmentally friendly disposal process.
Conclusion
In conclusion, the medium grit, diamond or ceramic drill bit stands out as the optimal choice for removing gel polish. Its design ensures efficient polish removal while being considerate of your nail’s health.
When it comes to nail care, especially the removal of gel polish, choosing the right tools is paramount. The use of an appropriate drill bit not only ensures a clean removal but also safeguards your nails from potential damage. Remember, while it’s important to maintain the beauty of your nails, their health should always come first. So next time you’re faced with the task of removing gel polish, reach for that medium grit, diamond or ceramic drill bit, and give your nails the care they deserve.
