
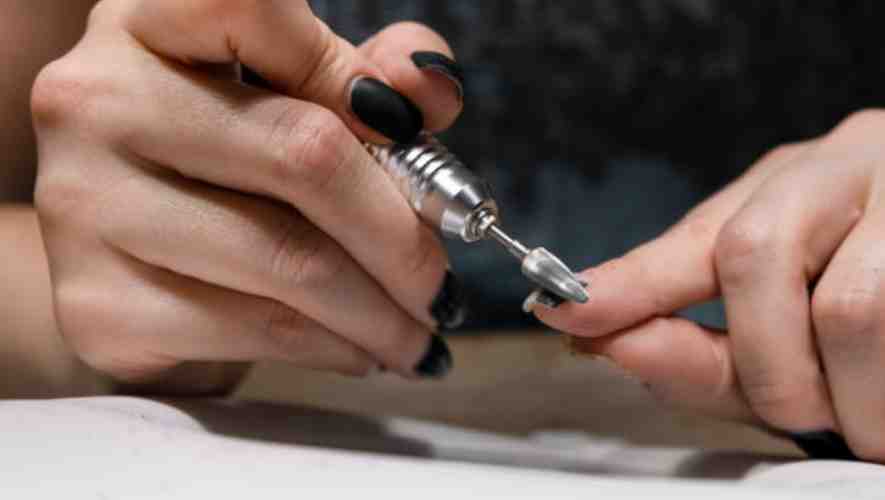
When it comes to removing gel polish, the process can be as intricate as the application. If you’ve ever struggled with the tedious task of removing gel polish, you’re not alone. The challenge lies in effectively removing the polish without damaging your natural nails. This is where the right nail drill bit comes into play.
Which nail Drill bit to use to remove gel polish? The best nail drill bit for removing gel polish is a medium grit, cylindrical or cone-shaped bit. This type of bit is effective in gently grinding down the gel polish without causing harm to the nail bed. It’s essential to choose a bit that corresponds to your skill level and the thickness of the gel polish.
Imagine finally being able to remove your gel polish effortlessly and safely. This blog will guide you through the selection of the appropriate nail drill bit, explain its proper usage, and offer tips to ensure a damage-free removal. You’re about to discover a more efficient, less damaging way to say goodbye to your old gel polish.
Types of Nail Drill Bits Suitable for Gel Polish Removal

Characteristics of the Ideal Nail Drill Bit for Gel Polish
The ideal nail drill bit for gel polish removal should possess certain characteristics for optimal performance. Firstly, it needs to be made from a durable material like carbide or diamond to withstand the rigidity of gel polish.
The bit should have a grit size appropriate for gel removal, usually medium to coarse, to effectively remove the polish without damaging the natural nail.
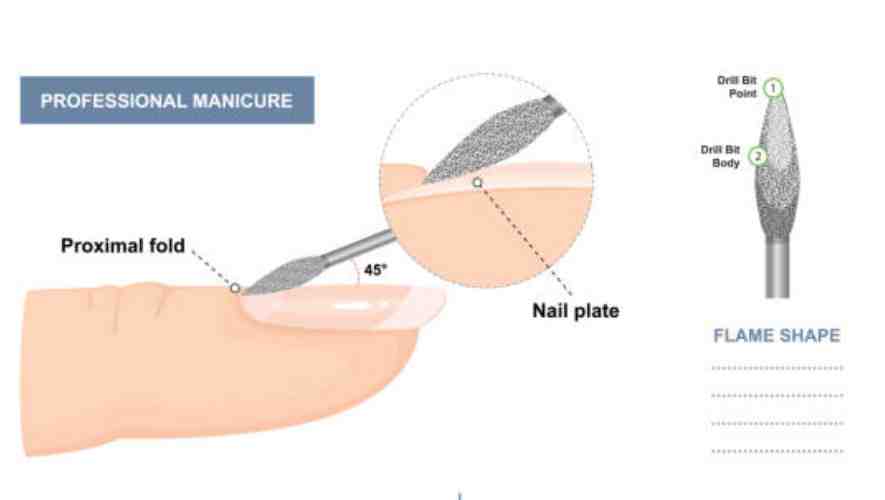
Thirdly, the shape of the bit should be suited to the user’s proficiency and the specific removal task – for example, a cylindrical bit for bulk removal or a tapered bit for precision work. Lastly, it should fit securely into the nail drill, ensuring safety and precision during use.
Comparison of Cylindrical, Cone-Shaped, and Other Bit Shapes
Cylindrical, cone-shaped, and other bit shapes each have their unique advantages in gel polish removal. Cylindrical bits are excellent for removing polish from the nail’s surface quickly, making them ideal for bulk removal.
Cone-shaped bits are designed to access tight spaces like the cuticle area and sidewalls, allowing for precise and careful removal without damaging the surrounding skin. Other shapes, like the tapered and flame bits, offer a combination of precision and efficiency, suitable for both detailed work and surface preparation.
Understanding the specific strengths of each bit shape can help technicians choose the right tool for different gel removal tasks.
Understanding Grit Sizes and Their Impact on Removal Efficiency
Grit size in nail drill bits is a critical factor in determining the efficiency of gel polish removal. Bits with a coarser grit are more abrasive and remove polish faster, but they can also be more aggressive on the natural nail if not used carefully.
Medium grit bits offer a balance between efficient polish removal and gentleness on the nail bed, making them suitable for most users.
Fine grit bits are less abrasive and are ideal for the final finishing touches or for users with sensitive nails. Understanding the impact of different grit sizes helps in choosing the right bit for efficient removal while maintaining nail health.
Step-by-Step Guide to Using Nail Drill Bits for Gel Polish Removal
Preparing Your Nails for Safe Removal
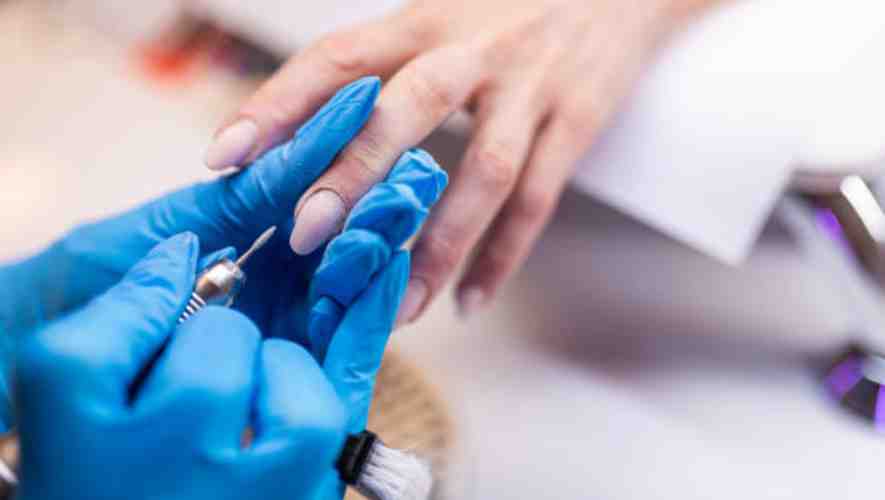
Before using a nail drill for gel polish removal, it’s crucial to prepare your nails to ensure safety and efficiency. Start by cleaning your hands and nails thoroughly to remove any dirt and oils. Trim your nails to a manageable length if necessary, and gently push back the cuticles for better access to the entire nail surface. This preparation step is essential as it not only provides a clean working surface but also prevents potential damage to your nails and skin during the drilling process.
Detailed Instructions on How to Use the Nail Drill Effectively
Using a nail drill requires precision and care. Firstly, select an appropriate drill bit – typically, a fine-grit bit is suitable for gel polish removal. Begin at a low speed to gain control and gradually increase to a moderate speed as you become more comfortable. Move the drill in a back-and-forth motion across the nail, focusing on the thickest areas of polish. Avoid pressing too hard or staying in one spot for too long to prevent heat buildup and damage to the nail bed. Regularly check the progress and stop drilling once the bulk of the gel polish is removed, leaving a thin layer.
Tips for Minimizing Damage to the Nail Bed During Removal
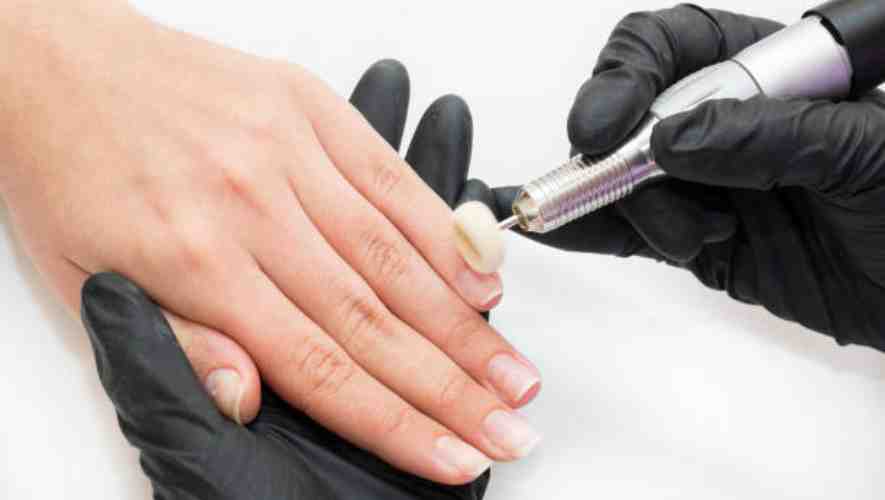
Minimizing damage to your nail bed is paramount during gel polish removal. Always use a nail drill at a speed you can comfortably control, and don’t apply excessive pressure. Keep the drill moving to avoid friction burn.
Hydrate your nails before and after the procedure with nourishing oil or a hydrating nail treatment to maintain their health. If you experience any pain or discomfort, stop immediately and consult a professional.
Regular breaks during the process can also help in reducing the risk of overheating and damage to the nail bed.
Safety Considerations and Best Practices
Importance of Nail and Skin Protection During the Process
Protecting your nails and skin isn’t just about avoiding immediate injuries; it’s also about preventing long-term damage. Exposure to harsh chemicals, extreme temperatures, or rough materials can lead to conditions like dermatitis, fungal infections, or even permanent skin damage.
Wearing suitable protective gear, such as specialized gloves, can provide a barrier against these hazards. It’s also important to follow proper hygiene practices, like washing your hands thoroughly after handling hazardous materials.
Implementing and adhering to a routine for skin care, after exposure to potentially harmful substances, can help maintain the health and integrity of your skin and nails.
How to Avoid Common Mistakes and Injuries
To avoid common mistakes and injuries, it’s vital to have a thorough understanding of the tools and substances you’re working with. Always read and follow the instructions provided, When handling chemicals or operating machinery.
Avoid shortcuts that compromise safety, and don’t hesitate to ask for help or clarification when needed. Regularly inspecting your equipment for any signs of wear or damage is also key in preventing accidents.
Finally, ensure that you’re working in a well-lit area to clearly see what you’re doing, as poor visibility is a common contributor to accidents.
Maintenance and Hygiene of Nail Drill Bits
Exploring Other Methods: Soaking, Wrapping, and Manual Filing
Beyond the use of nail drills, alternative methods like soaking, wrapping, and manual filing play a significant role in nail care. Soaking nails in gentle solutions can soften the cuticles and prepare the nails for treatments, reducing the need for mechanical intervention.
Wrapping, often used in the removal of nail enhancements like gels or acrylics, involves less abrasive techniques, thereby preserving the nail’s integrity.
Manual filing, on the other hand, offers a more controlled and less aggressive approach compared to drills, allowing for precise shaping and surface smoothing. These traditional methods are essential in comprehensive nail care, catering to diverse nail conditions and preferences.
Comparing the Efficacy and Safety of These Methods to Nail Drills
When evaluating nail care techniques, the efficacy and safety of soaking, wrapping, and manual filing versus nail drills are paramount considerations. Soaking and wrapping methods are Gentler, reducing the risk of nail damage and overexposure to mechanical stress.
Manual filing, while time-consuming, allows for a high degree of control, minimizing the chances of nail thinning and heat generation, common issues associated with nail drills. Nail drills offer efficiency and precision, In professional settings, where time and intricate designs are factors.
Each method carries its own set of benefits and limitations, making it crucial to choose based on the specific needs of the nail and the desired outcome.
When to Choose an Alternative Method Over a Nail Drill
Selecting an alternative method over a nail drill should be based on several factors, including nail health, desired results, and personal comfort. For individuals with thin, brittle, or sensitive nails, gentler methods like manual filing or soaking are advisable to prevent further damage.
Similarly, for those seeking a more natural look or wishing to avoid the noise and vibration of a drill, traditional methods are preferable. It’s also important to consider the skill level of the user; manual methods require less technical skill and pose a lower risk of accidental damage.
Ultimately, the choice should align with the individual’s nail condition, aesthetic goals, and personal preference for a nurturing and safe nail care experience.
Conclusion
In conclusion, choosing the right nail drill bit for removing gel polish is crucial. A medium grit, cylindrical or cone-shaped bit is typically the best choice for most users. It ensures an effective and safe polish removal experience.
Always remember that the key to successful gel polish removal lies in using the right tools and techniques. By following the advice and suggestions provided in this blog, you can achieve salon-quality results at home. Feel confident in your ability to remove gel polish with ease and protect the health of your natural nails. Your journey towards a more effective and safe nail care routine begins here.
